Product detailed benefits
This page provides a step-by-step guide on creating a field group to display the benefits of a product on its detail page. We will explain how to create the field group, input data, and integrate this information into the product page template.
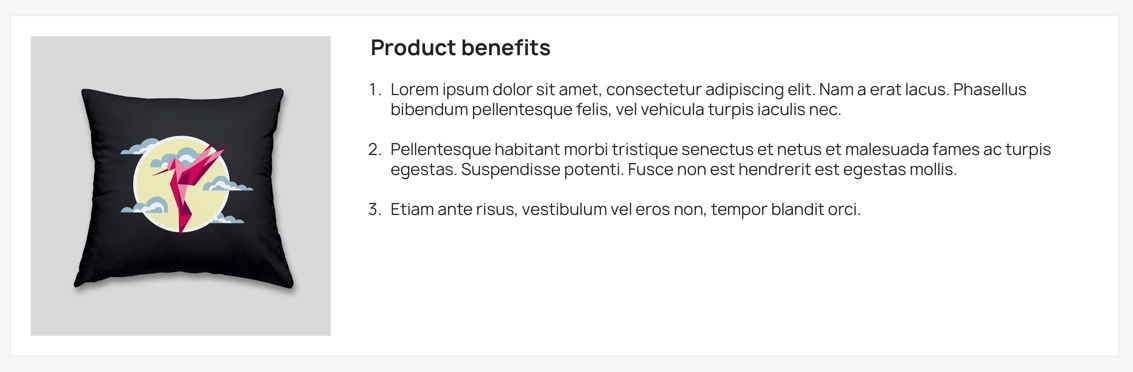
Desired output
Below is an example of the desired output on the product page:
Creating the field group
- Access the field groups page:
- Navigate to the CustomFieldGroups module menu.
- Click on "Add a new field group".
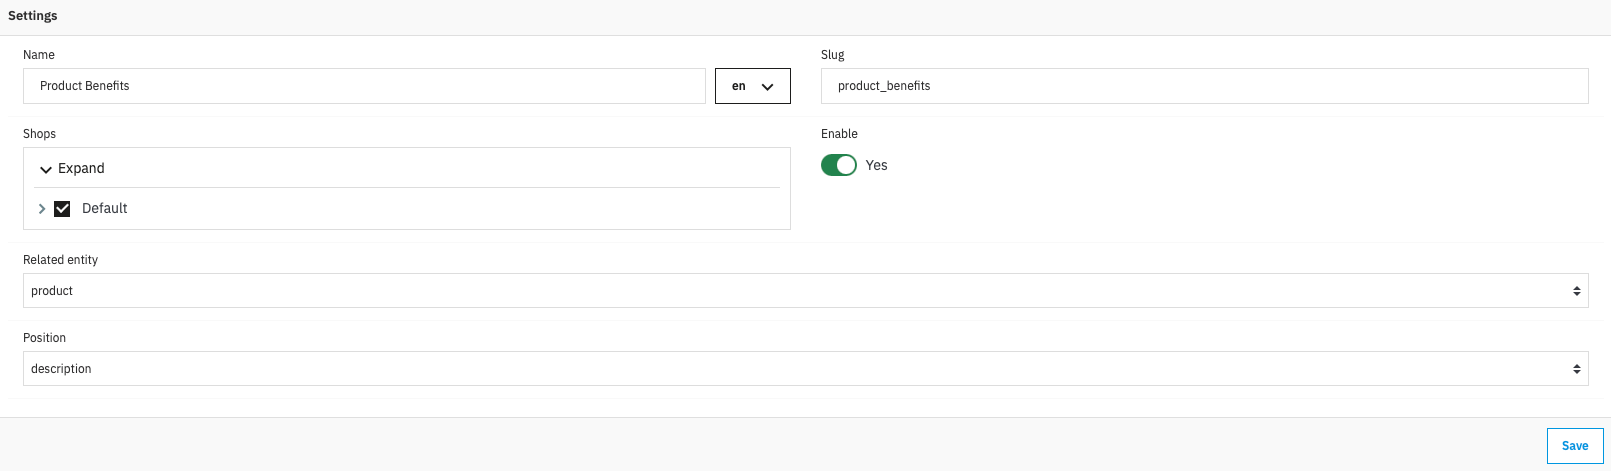
- Define the field group settings:
- Name: Product Benefits
- Slug: product_benefits
- Shops: Select the appropriate shops
- Entity: product
- Position: description
- Add the necessary fields:
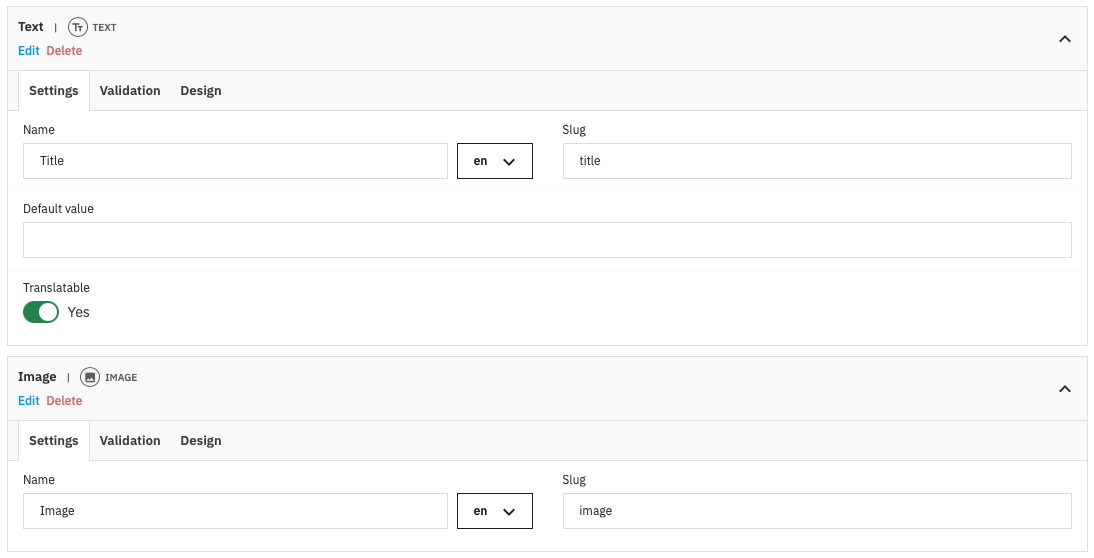
- Block title:
- Type: Text
- Name: Title
- Slug: title
- Translatable: true
- Require: true
- Block image:
- Type: image
- Name: Image
- Slug: image
- Require: true
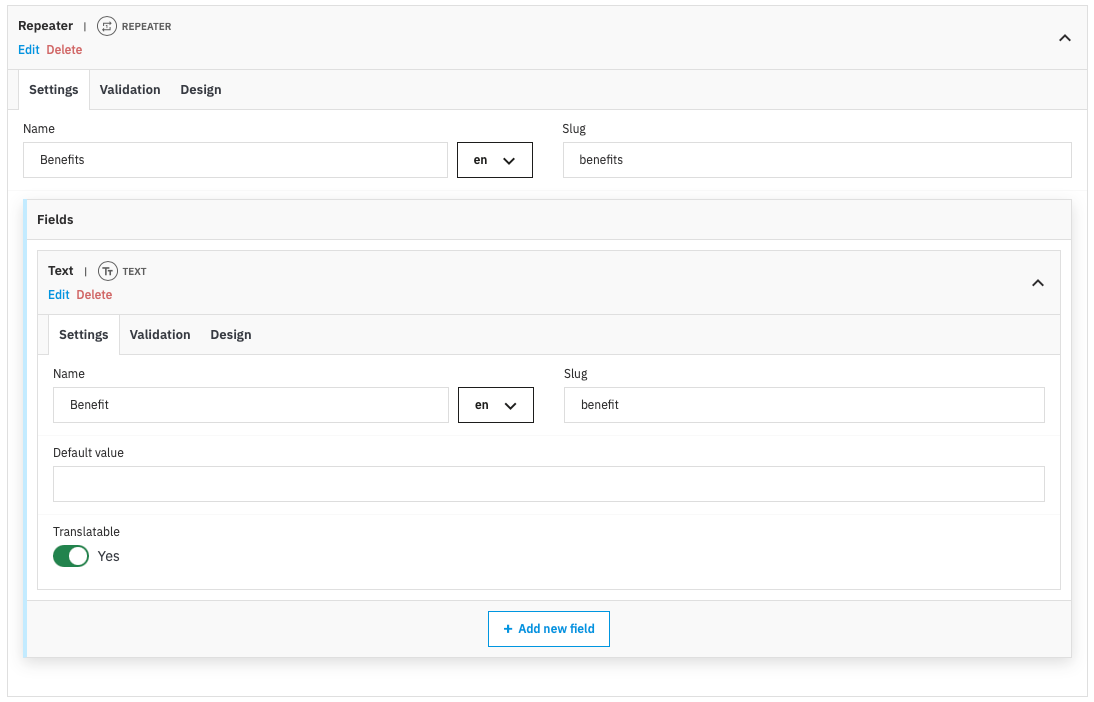
- Benefits:
- Type: Repeater
- Name: Benefits
- Slug: benefits
- Fields:
- Benefit:
- Type: Text
- Name: Benefit
- Slug: benefit
- Translatable: true
- Benefit:
- Block title:
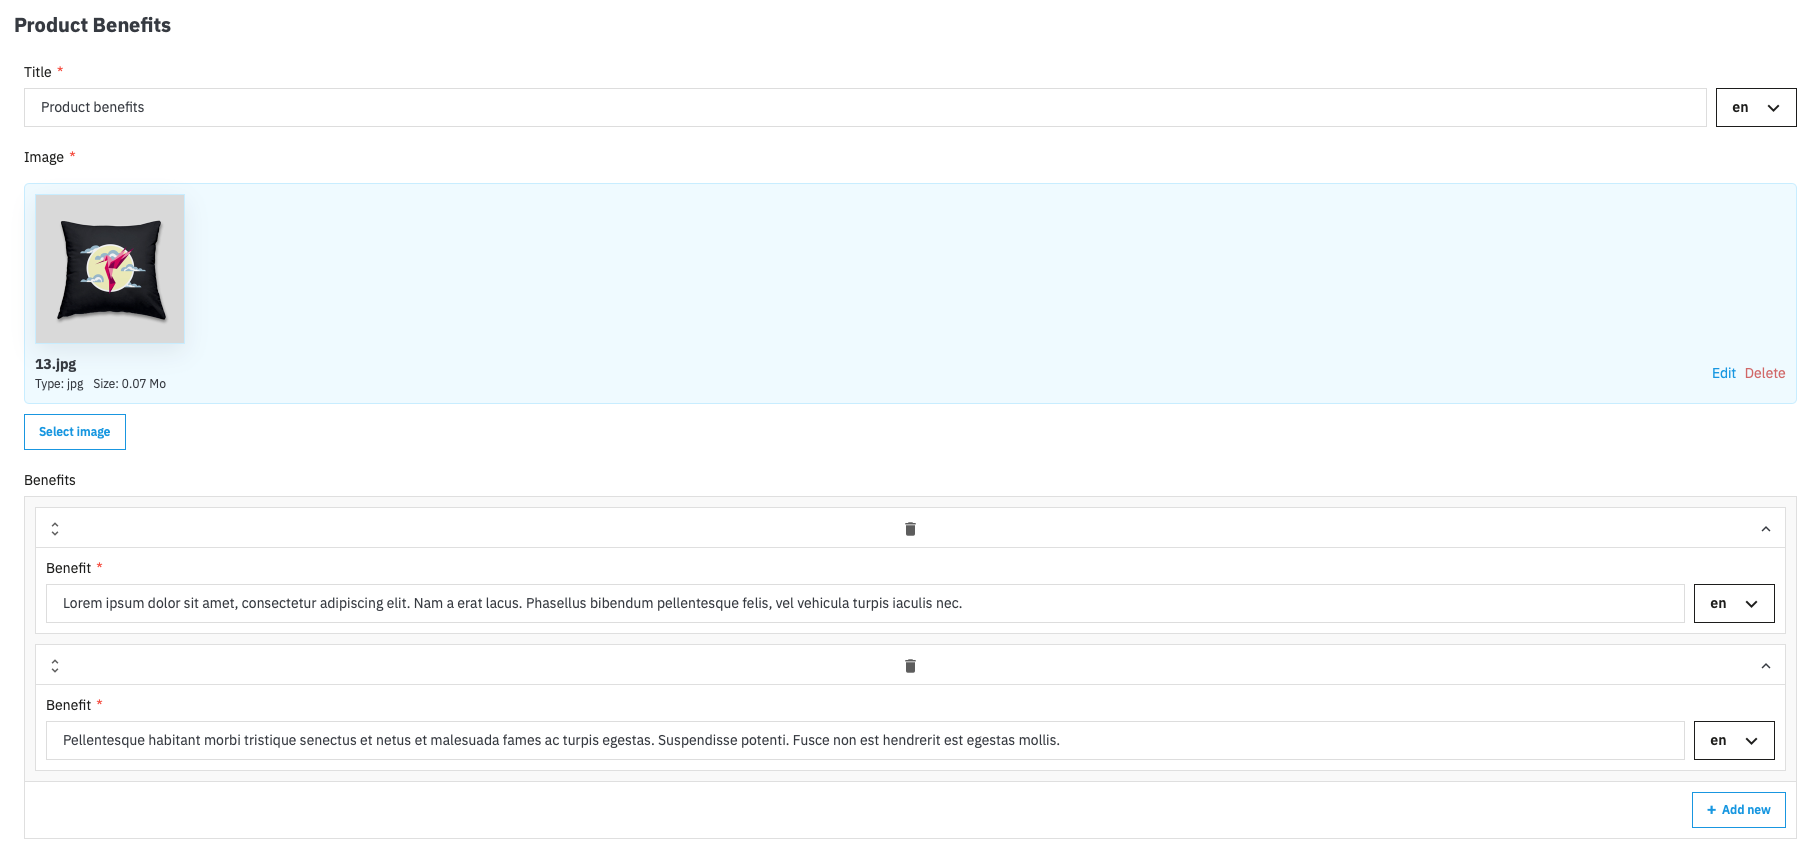
Populate the data
- Go to the product management page
- In a product page, find the "Product Benefits" form in the description section. (Or the section you selected in the field group settings)
- Fill in the title and image field with data you want to display.
- Add benefits by clicking the "Add new" button and filling in the text for each benefit.
Integrate into the product page template
- Open your theme's product template file: Locate and open the product template file in your theme, usually found at /themes/your-theme/templates/catalog/product.tpl.
- Add the following code where you want to display the benefits:
{* Check if the field group is defined and if there are any benefits to display *}
{if $product.cfg.product_benefits and count($product.cfg.product_benefits.benefits)}
  <div class="product-benefits">

    {if $product.cfg.product_benefits.image}
      <div class="image-container">
        <img src="{$product.cfg.product_benefits.image.url}" alt="{$product.cfg.product_benefits.image.name}" />
      </div>
    {/if}

    <div class="content">
      <h2>{$product.cfg.product_benefits.title}</h2>
      <ul>
          {foreach from=$product.cfg.product_benefits.benefits item=row}
            <li>{$row.benefit}</li>
          {/foreach}
      </ul>
    </div>

  </div>
{/if}
For the product entity, field groups are automatically integrated into the product presenter by the variable "cfg". For product object or other entities, you must retrieve data using the following method:
{* Object or Entity and Id *}
{assign var="data" value=$modules.customfieldgroups.data->get($product)}
{assign var="data" value=$modules.customfieldgroups.data->get('product', $product.id)}
You can also use a hook to display the block on the product page. In this case, you have to create a simple module and hook it where you want to display the block. Use the following code in the hook function to retrieve the data:
public function hookDisplayFooterProduct($params) {
  // Get retriever
  $dataRetriever = DataRetrieverFacade::getInstance();

  // Get product field groups
  $data = $dataRetriever->get('product', $params['product']['id']);

  // Get benefits
  $benefits = empty($data['product_benefits']['benefits']) ? [] : $data['product_benefits']['benefits'];

  // Assign smarty
  $this->context->smarty->assigns([
    'benefits' => $benefits
  ]);

  ..
}
- Add custom styles (optional): To enhance the appearance of the benefits on the product page, you can add custom styles in your CSS file.
.product-benefits {
  background-color: #fff;
  border: 1px solid #eee;
  display: flex;
  margin: 20px 0;
}

.product-benefits > div {
  padding: 20px;
}

.product-benefits .content li {
  list-style-type: decimal;
  margin-left: 20px;
  margin-top: 20px;
}

.product-benefits .image-container img {
  height: auto;
  width: 300px;
}
Final result
Once these steps are completed, you should see a new benefits block on the product detail page, displaying the block title and the list of benefits you entered. This approach allows for easy customization and quick updates to the information without needing to modify the template code each time.